The only thing is that this proper method includes registration marks and makes you loose half of your paper. How sweet ! So... I am not going to talk about this today. The way I cut my stickers is far from perfect, if you want me to be honest, this is completely ratchet and maybe you're going to lose some hairs (because who doesn't with those kind of machines) but it's working for me, and helps me to save ressources. And I am all for it ! Just so you know if you're, like me, a perfectionist, you'll have to accept that sometimes, things cannot be perfect.
Again I am using Photoshop and it's in french, I hope it's ok.
+ PREPARING MY FILE WITH PHOTOSHOP.
Ok. So. I usually prepare my file for printing and cutting at the same time. It's just a matter of preference, but, this way, my file is all prepare for use.
As I mentioned in the other part, I start with the outline. My designs are all separated from the background so I just have to use the stroke option on Photoshop, like so (by the way, don't hesitate to print some different stroke tests; usually it's easier to see it when printed rather than on the computer).
Next, I prepare my cutting files. I need two files because I am doing the Kiss Cut and the Die Cut on the machine.
For the Kiss Cut, I duplicate my design with stroke and flatten the layer with a new one, juste to have the whole shape (design+ white stroke) flattened. This way, I can recolor it in a dark grey, so it's easier to select the shape to cut, later, in Design Space. I also put 2 registration marks in the corners which will also be useful in Design Space.
For the Die Cut I just fill a rectangle of the same size as my final sheet in dark grey. And I keep the same registration marks.
I save them both in A4 which is the size of my print, RGB, 300dpi, JPEG.


+ LET'S JUMP INTO DESIGN SPACE.
Once design space opened, I create a new project and import my cutting files in the tab "Upload". I follow the instructions and save my files as a Cut Image.
Then I import the files in my project and resize them. My final file is a A4 (210 x 297 mm) so it must be the same on the screen. And I position my files in the top left corner by typing 0 for X and Y axis like so :
I do this for both files. As you can see, I keep them in the same project. My designs cut line on the top layer and my sheets cut line on the bottom layer.
Once my files are in the right place, I disable the registration on the bottom right because I don't want the machine to cut it. It has just helped me to resize my files perfectly but I don't need it anymore.
For this, I just select the tab Contour in the bottom right of my screen. And then click on the shape that I want to make disappear.
Last step, I save my project, which is all set up now.
+ PREPARING THE MAT.
Ok. So for this kind of cutting, you don't use the mat as it's planned. As I am not using the Cricut registration marks for Print and Cut, I can't use the traditional grid. I need to make my own so I can place my paper properly. For that I use a simple removable tape.
And I am basically putting tape all over the sticky part of my mat. Then I am going to cut with the machine a rectangle which is the same size as the paper sheets that I always use. You can even double the tape thickness where the machine is going to cut, so it's even easier to fit your paper sheet in. After that, you just have to peel off the rectangle that you cut.
This way, you know exactly where the machine is calibrate to cut. Even better, you now have a tape frame that helps you to put your paper at the right place very easily.
I didn't came up with this idea, it comes from this super helpful video.
Here is what it looks like when I put my printed sheet of paper. I secure it with some washi tape because my mat does not stick evenly.
+ THE CUTTING.
Now that everything is settled, I start the cutting part. I already have 2 custom materials that match my paper, one for Kiss Cut, and one for Die Cut (captain obvious here!). It doesn't show on the picture but I always start by the Kiss Cut because it avoids the paper to bend if the mat doesn't stick enough.
My machine itself is on "Custom" mode.
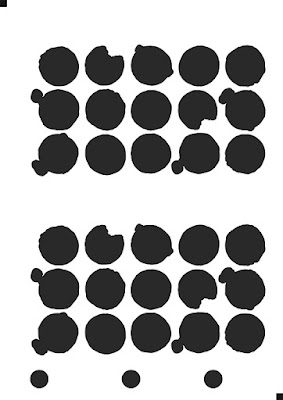
And this is where my little circles help me a lot. This way I can see if my mat is well placed. You can see here that it's a bit offset, but nothing too crazy. Anyway, the machine doesn't cut evenly. I have stickers that are just perfectly cut and some are not, on the same sheet. I don't think it's really a problem since it's only a question of 0.5 mm most of the time. I just need to put my perfectionist self in the closet for a sec.
And that's it ! Once my Kiss Cut is done, I unload and reload my mat for the Die Cut. Here is the result.
This method can be rough but the more I do, the more I know the machine and the less time I spend fixing things. I have a very few loss but I am pretty sure it's less reliable than using the Cricut official registration marks. But it's the only solution I've found to use my whole sheets of paper and I am personally ready to close my eyes on some imperfections if it allows me to do less waste and be more Eco friendly.
Anyway, I hope this "guide" was useful for you. Again, feel free to ask me questions and if you have suggestions to improve the method, I am all for it.
Take care ! x x x


No comments:
Post a Comment